
Whether you are looking for a touch-activated or manual kitchen faucet, you should make sure that it can swivel. From washing food-covered hands to hand-washing a cookie sheet or draining pasta, a swivel spout will make your life easier and more comfortable, at least in the kitchen.
Table of Contents
Do kitchen faucets swivel?
The arc and swivel support determine whether or not a kitchen faucet can swivel. A kitchen faucet with a swivel capacity is available in a variety of shapes and designs, depending on the ideas of a kitchen designer. Most kitchen faucets have a 180–360 swivel support, allowing for easy swiveling.

It is easier to wash anything in the sink when you have a kitchen faucet that swivels without any convenience. The quality, durability, versatility, and swivel support of a kitchen faucet that swivels well are all important considerations.
While most brands provide a limited lifetime warranty, make sure you purchase a kitchen faucet that matches your preferences. Furthermore, if you don’t want a faucet that will flood your kitchen, be sure to understand the swiveling degrees.
Moen kitchen faucets that swivel?
Moen kitchen faucets are an excellent choice for a touchless swiveling kitchen faucet. In this case, everything would be covered except for damage caused during the installation period.
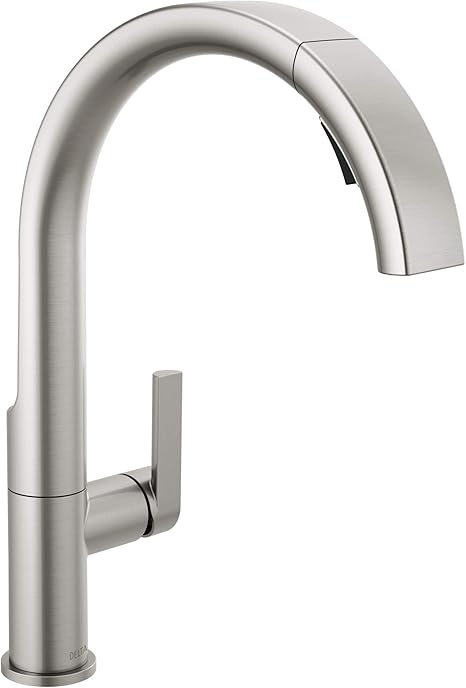
Can Delta kitchen faucets be swiveled?
Delta faucets are quite remarkable if you want a non-electronic lifetime warranty covering any defect in a faucet that swivels well. If you don’t want a flood and prefer a faucet that swivels less than 180 degrees, the Delta 136 DST is an excellent choice.
Do the kitchen faucets from Kohler swivel?
Yes, Kohler faucets can swivel. Kohler is one of the market’s oldest and most well-known companies. They are well-known for their swiveling durability and straightforward designs. Kohler faucets provide 812-inch clearance for the most flexibility if you want a spout that rotates a full 360 degrees.
Do you have a high-arc swivel kitchen faucet?
High-arc kitchen faucets have an elegant design and tall spout faucets that reach up and swivel above the sinks without causing a flood. The spouts are standard spouts that provide 3″–5″ over the sink.
However, there is a risk of splashing on the shallow sinks.
Is it possible to swivel a Grohe kitchen faucet?
Grohe kitchen faucets outperform other brands on the market in terms of swivel support and user-centric features. While many Grohe faucets look good, Ladylux and the more affordable Eurodisc are worth mentioning.
Is it possible to swivel a Pfister kitchen faucet?
With a Pfister Lifetime Limited Mechanical & Pfinish Warranty, they provide high-quality swivel faucets that will last for years. Their after-sale customer service, on the other hand, is sporadic.
Do swivel kitchen faucets exist?
The answer is yes. A pull-down kitchen faucet can swivel 190 degrees or 360 degrees. If you want a permanent kitchen faucet, a pull-down is a way to go.
What causes a kitchen faucet to swivel?
Kitchen faucets with spouts allow the faucet to swivel and control the flow of water accordingly. The spouts are not linked to the main body that controls water flow. When you put the spout sleeve over the upper and lower O-rings, it stops water from getting in and lets you turn the spout to get the water out.
However, if the spout assembly is too tight to rotate or the O-rings become dirty, the faucet will not swivel. Cleaning the insides of the faucet would be life-saving advice.
How do you fix a swiveling kitchen faucet?

It’s a fairly common problem to have a kitchen faucet that won’t swivel. In this case, friction happens when the sleeve inside the faucet’s neck scratches against the metal. This causes friction, which stops the faucet from moving freely.
However, such minor inconveniences are not caused for concern. A flashlight, a screwdriver, a Philips head screwdriver, an Allen wrench, and channel locks are all you’ll need to repair a kitchen faucet.
Step 1. Turn off the water and loosen the screws.
When the kitchen faucet does not swivel, it disrupts the kitchen workflow. In that case, turn off the hot and cold water supplies under your kitchen sink.
Two Philip-head screws may be visible, holding the faucet in place via the washer. Turn the screws to the left to loosen them.
Step 2: Take out the faucet.
When you turn the water on and off, the screw holding the faucet handle may prevent the faucet from moving. With a screwdriver, you can easily remove the screw. To remove the handle, half-turn a screw on the left side with an Allen wrench (3 mm is a standard size for kitchen faucet screws).
The next layer to be removed is the round metal that holds the faucet carriage in place. Because it’s made of the same soft metal, you can twist it off with your hand.
Wrapping a towel or a few channel locks around it can help if it becomes stuck.
Step 3: Take out the cartridge and the sleeve.
Pull the cartridge up from the inside of the faucet neck to unfasten it. You can see a thin plastic sleeve inside the faucets if you loosen the screws enough under the counter.
Finally, you’ll find the edge where the sleeve was attached. Before you put the faucet together, rub it immediately. You can also apply lubricants to the sleeve, such as grease. Finally, turn on the water supply.
Congratulations on saving both time and money.
What is the best way to lubricate a swivel faucet?
A faucet can become extremely difficult to swivel at times. A lubricant, for a door or a lock, can solve the problem instantly. It may not be as simple as lubricating the door or hinges, but here are a few steps you can take to lubricate a swivel faucet.
Step 1. Remove the plastic cover over the Allen screw.
Switch off the cold and hot water supplies. With an Allen wrench, remove the plastic cap covering the Allen screw and unscrew it. Remove the handle stem.
Step 2: Rotate the metal counterclockwise.
With a wrench, remove the metal cap covering the faucet ball and turn it clockwise to loosen the threads. If the cap does not have a smooth surface, wrap it with a soft cloth or towel.
Step 3: Remove the ball from the faucet and disassemble the spouts.
Pull the ball up from the stem to remove it from the faucet body. Disassemble the seats to prepare them for lubrication.
Step 4: Lubricant application to the faucet body
On the faucet body and inside the spout, there are two rubber o-rings. To begin, apply a small amount of silicone faucet grease to both O-rings and press the spout to ensure that it swings back and forth.
Finally, grease the rubber seats and replace them on top of the springs.
Step Five: Tighten the cap firmly.
When you apply grease to the rubber seats, make sure the springs and seats stay in place and the tab adjusts to its slot completely in the faucet body. Tighten the cap and the Allen screw while holding the ball in place.
It will no longer squeak once you can freely move the handle in full motion. As a result, you can fix it without calling a plumber!
How do you repair a dripping swivel faucet?
A leaking swivel faucet wastes both water and money. But don’t be concerned. We’ll show you how to fix a dripping swivel faucet in your own home.
Equipment types:
- A 4-in-1 screwdriver is required.
- Allen Wrench
- Pliers
- Plier with a slip joint
Step 1: Learn about the anatomy of a faucet and the tools used to repair it.
Before repairing any faucet, we recommend that you first learn about the anatomy of the faucet. The ball, springs, seals, O-rings, and a small repair tool are included in the repair kits. With these tools, you will be able to quickly fix the faucets.
Step 2: Take the Allen screw out.
Turn off the water supply to temporarily stop the leaking faucet. To reveal the Allen screw, remove the decorative cover that hides the handle. Continue rotating the screw counterclockwise until it is too easy to lift the handle.
It should be noted that if water is dripping from the faucet handle base, simply remove the handle and tighten the ring. If the faucet leaks at the spout’s end, replacing the seats and springs is the best option.
Step 3: Remove the cap and install the rotary ball.
At this point, use slip-jointed pliers to remove the cap. Lift the ball and thoroughly inspect it before replacing it to confirm the presence of any scratches. Replace any scratches that you find.
Step 4: Remove the seats and springs.
A screwdriver would be useful to unscrew the seats and springs. After removing the old seals and springs, replace them in the recess with new rubber seals and springs.
Finally, turn the cap on with the adjusting ring and tighten it with the pliers. Check the water flow to see if there is any leakage. Your job is finished once you replace the dripping faucet handle!
Installing and maintaining a swiveling kitchen faucet can be difficult if the quality and durability are not up to par. In that case, comparing the market’s available brands would be a wise decision. When in a bind, never be afraid to reach out with your inquiries!